CSc 433/533: Straw
Synopsis
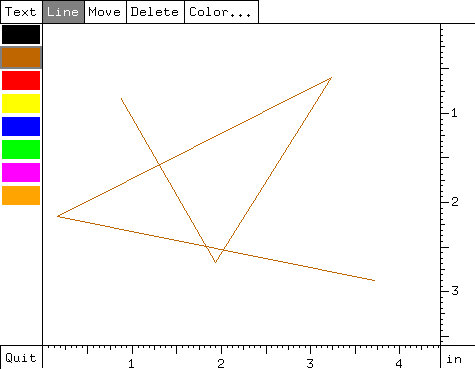
Straw is a simple drawing program designed to explore the
implementation of some simple interaction techniques. The application
is initiated by typing straw at the shell prompt. A
window appears on the screen, initially with an empty drawing area of
size 500 by 700 pixels. The picture below shows the (resized) screen after
drawing a brown line.
There is a row of command mode boxes along the top of the window.
There is an additional box, the quit box, at the lower left
corner. There is also a vertical scroll bar on the right side
and a horizontal scroll bar on the bottom, both displayed
as rulers.
Finally, there is a color palette on the left side consisting
of a vertical column of eight color boxes.
Scroll Bars/Rulers
Each scroll bar consists of a ruler. One may grab the ruler at any
point and slide it left/right (horizontal) or top/down (vertical).
The corresponding portion of the drawing canvas appears in the drawing
area when the ruler is released. Technically, a ruler is
grabbed when the left mouse button is pressed anywhere within the
rectangular region of the ruler. While the button remains pressed,
the ruler tracks the position of the cursor, relative to its position
when the button was pressed. The cursor need not remain in the ruler, the
ruler simply tracks the relevant coordinate of the cursor (e.g., the
x-coordinate for the horizontal ruler). The ruler is released when
the left button is released. Note that coordinates on the
ruler may not be negative, the underlying drawing canvas is assumed to
be semi-infinite in the +x and +y directions only.
Command Modes
Commands modes are toggled by clicking on the appropriate box. A
click consists of pressing the left mouse button and then releasing it
later, not necessarily within any time frame. When the button is
pressed, the command box is highlighted. While the button is
pressed, the box is highlighted only if the cursor is in the box,
i.e., highlighting is
turned off if the cursor is moved out of the box, and turned on if the
cursor moves back in the box. When the button is released, the
selection is considered to take effect only if the cursor is in the
command box where it was pressed, in which case the box remains highlighted
and straw enters the selected command mode.
A command mode is De-selected by clicking on it again, or by
selecting another command.
Text
To add a text item, click the left mouse button with the cursor at the
position for the baseline of the leftmost character.
This position is the (x,y) coordinate at the time
the button is released. One may then type in the desired text which
is drawn using an 8x13 fixed width font (GLUT_BITMAP_8_BY_13).
Carriage return (GLUT key value 13) begins a new line
immediately under the first.
Backspace (GLUT key value 8) erases the last character.
While symbols are being entered an underbar '_' is displayed
at the location where the next symbol will appear. The end of the
item is signaled by either exiting the text state, or by selecting
another position at which to place text with another button click.
Line
To draw a poly-line, click the left button when the cursor is at the
position desired for the first point. A rubber-band line then tracks
the cursor. Clicking the left button places another point at the
current cursor location (again considered to be the cursor (x,y) at
the time of release). Signal the placement of the last point by
clicking the right button.
One may then start another poly-line with a left button click.
Move
An item in the drawing area is grabbed by pressing the left
button while the cursor is within the bounding box of the item.
If more than one item's bounding box contains the cursor, then the
lowest-leftmost (
Lowest-leftmost means the item whose lower-left bounding box corner
(x,y) has minimum x-y. Ties are broken arbitrarily.
)
of these items is grabbed.
Once grabbed, the item's bounding box is displayed (in black) to
indicate the selection.
The position of the item and its bounding box
then track the cursor until the left button is released.
Delete
An item in the drawing area can be deleted by clicking the left
button while the cursor is within the item's bounding box.
If more than one item's bounding box contains the cursor, then the
lowest-leftmost of these items is selected for
deletion. When the button is pressed, the bounding box of the selected
item is displayed. If this button is released without any
intervening movement than the item is deleted. However, if the cursor
moves before the button is released, then the deletion is aborted and
the bounding box vanishes.

Color...
When this command mode is selected, a separate window (shown above) appears.
It permits one to change the rgb color of the current
drawing color (see below). The current values of red, green, and blue
are shown as a percent of full-on in the text boxes at right, and the control
knobs of the sliders are positioned accordingly.
One may change a red, green, or blue level by pressing a button while
the cursor is on the appropriate control knob. The knob then tracks the
x position of the mouse until the pressed button is released. While
the knob moves, the corresponding text value is continuously updated and
so is the color in the current drawing color box.
A user may ``fine tune'' the setting of a color coordinate by clicking
on one of the arrows adjacent to the sliders. This has the effect of
incrementing (or decrementing) the relevant color coordinate by 1%.
The text box, control knob position, and the current drawing color box
are updated at the release of the button (only if the release occurs when
the cursor is in the same arrow as the button press).
One may manually enter a value in the text box, by
clicking in that box. When the button is released, the box is
highlighted.
Backspace erases the last (least significant) digit.
Typed digits are appended to the right, shifting the number to the
left.
If appending the digit would make the value larger than 100, the digit
is ignored.
The entry is completed when one presses carriage return, in which case
the entered value takes affect; or when one presses a mouse button or
``q'', in which case the old value remains in affect.
Any characters other than backspace, carriage return, ``q'', and the digits
``0'' to ``9'' are ignored.
The color dialog window closes if one presses ``q'' at any time within
the window, or clicks the Color... command mode box.
Quit
The application exits when one presses
``q'' anywhere within the window (while not entering text) or clicks the
Quit box (located in lower left corner).
Color Palette
On the left side of the drawing area there is a palette of 8 colors,
from which the user may select the current drawing color. The current
color is indicated by highlighting the rectangular border around the
color box. (See the brown color box in the first figure.) There is
always a currently selected color, initially it is black.
Any new text or poly-line objects is drawn in the current
drawing color.
Old text and poly-line objects retain the color they were
originally drawn in.
A new drawing color is selected by clicking
in the color palette on the desired color box.
Again, a click consists of pressing the left mouse button in a color
box and then releasing it later in the same color box.
If the button is released while the cursor is outside the original
color box, no change is made to the current drawing color.
The palette should be initialized to the following colors black,
brown, red, yellow, blue, green, purple, orange. The palette colors can be
changed with the color command (see above).
Assignment Instructions
Undergrads do not need to implement the Color ... command mode
and associated color dialog box, though they do have to
implement the Color Palette.
Grad students are required to implement the Color ... command mode.
You may create fancier buttons and sliders if you wish, but the
carefully defined event sequences for activities such as selection,
grabbing, and placement, must be observed. That is, feel free to
embellish the appearance but not the interaction sequences.
Exactly 4 weeks are given to do this assignment. This makes the
due date 3:50pm, September 29.
To turn in your assignment, use the turnin command with the
assignment name cs433.prog1 if you are an undergrad and
cs533.prog1 if you are a graduate student. This should be
followed by the source files and Makefile I need to compile your program.
I should be able to type "make" on lectura to produce your version of
straw.
An example of a turnin command is:
turnin cs433.prog1 Makefile straw.c
You may use turnin as many times as you like up until the assignment
due-date (3:50pm, September 29).
Each subsequent turnin overwrites the previous version.
You are also required to turn in a print-out of your program in class
on the day it is due.
This assignment takes the average student 3-4 weeks to do. I
strongly urge you to START NOW!!
An OpenGL and GLUT tutorial is available here.
On lectura, the directory ~cs433/Fall00/straw
contains my implementation of straw.
This should give you some idea of how your version of straw should
work.
Hints
I suggest having one main window with three subwindows.
The main window is the frame around the canvas (drawing
area) subwindow which is bounded below and on the right by the
horizontal and vertical ruler subwindows.
This way GLUT handles all the clipping to the canvas and rulers can
use their own redisplay callbacks.
See the sample program canvas
for information about how to use GLUT's callback mechanism.